Wednesday, May 18, 2011

DIY Earring Display!

OMG can I just say how EXCITED I am that my earring display came out the way it did?? I did remember to take pictures along the way so I can post step-by-step instructions for you all as well!

To start you will need:
  1. whatever size picture frame you prefer. I chose 8X10 (which I found on clearance for $7)
  2. mesh/chicken wire/something along those lines (I found some plastic mesh things at ac moore for .69 each and got 3 colors because I couldn't decide in the store! lol)
  3. glue (hot glue will work best!), I made due with krazy glue and gorilla glue :)
  4. paint if you buy an unfinished frame and want to paint it
  5. fabric to back the frame (I found a .29 piece of felt at ac moore)
  6. scissors
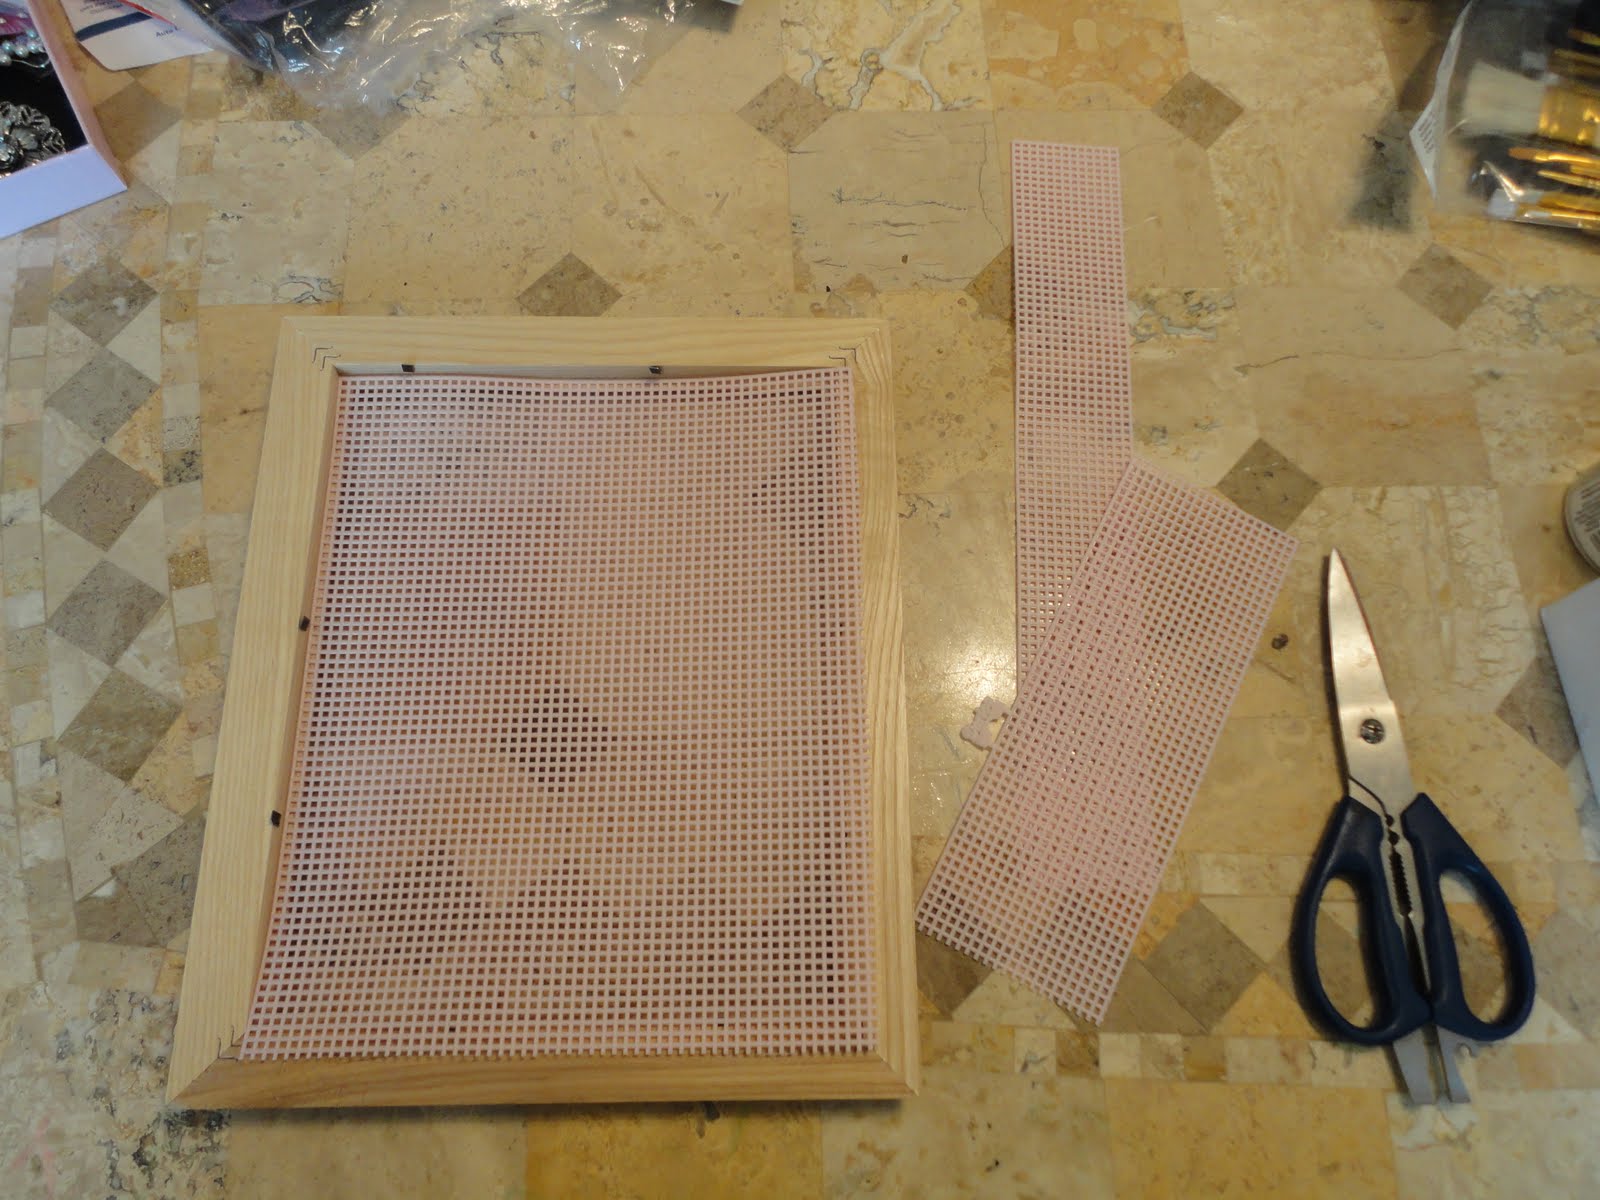
1. Cut your mesh or chicken wire, whatever it is that you picked up, to fit inside your frame the way a picture would. (IF you decided to paint your frame you would do that before this step)

2. Glue your mesh inside the frame, for some reason I couldn't find my hot glue gun so I had to use some gorilla glue to glue mine in.

3. Glue your fabric to the back of the frame (preferably with hot glue however I made due again with krazy glue) (please ignore all the other stuff in the background! lol)

4. Let your glue dry and then add your favorite earrings! :)

I am so so happy with how this came out! It was my first time making one but I think I am going to make some smaller ones to group some of my favorite earrings by color and display them on my wall..well see though!

On top of being super easy and fun to do, it was also a super cheap project for me
clearance frame: $7.00
plastic mesh: $.69
black felt: $.29
Total cost: $7.98

I hope you guys find this helpful and as easy as I did!

Tuesday, May 17, 2011

Gel/Shellac Nails

Hey guys!

I'm sure a ton of you have heard about gel or shellac manicures and I wanted to share some info with you about them!

I have recently started doing them in my salon and have answers for your most common questions!

Q: Is there a difference between gel and shellac?
A: No, gel and shellac manicures are the same, only difference is different companies call them one or the other.

Q: What is the difference between a gel manicure and a gel overlay?
A: A gel manicure is a gel polish. Both cure in a UV light, however a gel overlay is a buildable gel that is generally used with tips much like acrylics.

Q: How do I take my gel or shellac polish off?
A: Your best bet is to go back to your salon and have them soak the polish off. It takes 15-20 minutes for the polish to soak off in pure acetone. Please DO NOT peel or rip the polish off, this can cause damage to your nail! Yes, you can purchase pure acetone and soak them off yourself.

Q: Can I still get a french manicure with gel or shellac?
A: Absolutely!

Q: How long will they last?
A: There is no guarantee for how long they last as everyone is different, but typically around two weeks.

Q: Why does my gel polish peel off the same day I had them done?
A: Some people just cannot wear gel polish. If you have oily nails, chances are your gel polish could peel or pop off right away.

Q: How long do they take to dry?
A: As soon as your nails are done curing in the UV light, you are completely dry! No worrying about smudging or chipping your nails! :)

Here are some pictures of my first ever gel manicure :) The color I used is called "dulce de leche"


My friend has really short nails that she bites and cuticles that she picks, she works with animals so she constantly has her hands in water or is washing her hands. (I'm working on the biting and picking though! lol)

Hope this helps you guys out with any questions you may have about gel/shellac manicures :)

It's been forever :( ...

And I am really trying hard to get back into blogging. I have decided to kind of add a couple more elements to this blog and post about not just beauty and hauling but home decor as well.

Since my ex and I separated last year, I have been super into fixing my condo up and getting everything the way I want it.

I have so much stuff that it's hard for me to keep everything organized but I have been working on it hard and getting everything done! It is taking a lot of time but I love how things are coming along!

My most recent project has been organizing my jewelry. I have tons of it so it has been hard to find places to display it all and have it easily accessible for me. Today I am heading to michaels or joannes to make a DIY earring display. I will definitely post pictures of how to do it when I do actually make it.

For now I will show you what I have done for my necklaces. A friend of mine gave me his old wall mount tie rack when he was moving and I have finally gotten around to putting it up (more like having my boyfriend put it up for me! lol).

Here's how it turned out:
It looks much more sparkly on my wall, for some reason my camera didn't pick up all the bling. I love how it looks there and it keeps all my necklaces untangled and out of the way! Plus the tie rack fit perfectly in between both of the closets in my room!